I have a couple of confessions to make here. First, my birthday is not January 1. (No I am not going to tell you when it really is). Second, I have been doing a lousy job of backing up my contacts all these years. Welcome to the second part of what is turning out to be a series of posts on what can make your backups stronger. I wrote the first part earlier this year about learning how to backup my Google Authenticator codes when I bought a new phone. Today has actually two challenges. Let’s take the contacts related one first.
For what seems like since the last century, I have been using Google’s now-called Workspace for my main email communications, and also using its Contacts app to store my contacts. Over time I have collected more than 9,000 records in my app. I am sure many of these records are outdated, and every so often I make a half-hearted effort to update people that I come across in LinkedIn that have changed jobs.
Every month or so, I export this contact list into a “Google CSV” file that I dutifully save on my local hard drive. Until today, I have never tried to examine this file to see how it is formatted or even if it contains any useful data. That is the cardinal sin of better backups: Don’t just assume that because you have made a copy of your data that it can be usable.
The reason for doing this is that I came across a Gmail account that I set up long ago that could be used to recover my main email if something should go wrong with my main identity. I don’t use this account for anything, and indeed it had no contact records to prove it. So I thought, this might be a good time to see if I can import my backup contact records. I found out that Gmail is limited to importing only 3,000 contacts per each import. This meant splitting the CSV file into at least four parts. Fortunately, there is an online tool that you can use to do this, and if you don’t have too many requirements, it can be done for free. I had to guess how to split the file up, and luckily I guessed fairly accurately, because I only lost 16 records. It took some trial and error — and liberal use of Gmail’s “undo” feature, before I figured this all out.
Now the hard part is going to be remembering to do this again — sadly, the only way to update my backup contacts is to clear out all of them and start this process all over again. (You can export selected contacts, but I have no way to sort them since a certain date, for example, to do an incremental backup).
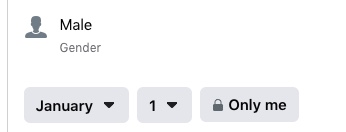
 Okay, let’s move on to my fake birthday. I did this deliberately as a security measure, to prevent the many people who look me up on The YouTwitFace from getting one piece of data that could be used to compromise my identity. Now, since I did this some of the social media services have placed restrictions on who can see my birthday (as the screen shot here shows The Face’s settings). But I haven’t bothered messing with this until this past week, when I got an assignment to write for The Verge about what happens when your account is hacked. One of the problems is that The Face makes it very hard for you, as the rightful account owner, to prove that you are indeed that person and not some poseur hacker. One of the ways that you are asked to verify yourself is to upload a photo of your ID, showing your actual face and actual birthday. Given that it isn’t 1/1, I will have an issue if at some point I do get hacked and try to present this ID.
Now, I have a choice: I can give Zuck my real birthday and trust that he will not spread it across his universe in the process of selling ads to further target me, or not give out this information and trust that the methods that I have used to protect my account (multiple authentication factors) are sufficient to stop most hacking attempts. I guess I am sticking with 1/1 for now, unless I want to get some fake driver’s license with 1/1 as my birthday that I can use to get into bars and get my account reset.
One other point of discovery as I was rooting around in my account details: I somehow gave The Face access to spend money using my Paypal account. Oopsie. I got rid of that connection quickly. There are two different places you specify this: one called Ads Payments (where they can run ad campaigns and charge you accordingly) and one called Facebook Pay (where you can give money directly to people or causes). You should ensure that the “payment methods” fields are blank in both of them if you don’t want any of your bank account details stored.
So I feel somewhat safer after doing all this, but still not happy that I have to take deeper and deeper dives into protecting my data. I will send you all a note when my piece in The Verge is posted, so you can learn about other ways to better prepare yourself against potential hackers. Spoiler alert: it is not an easy fix.
 A consortium of A-list reporters from 17 major American and Euro news outlets have begun publishing what they have learned from the documents unearthed by whistleblower Frances Haugen. The trove is a redacted copy of what was given to various legislative and watchdog US and UK agencies. The story collection is being
  The term conjures up glue guns and glitter, which isn’t a bad metaphor for what is really behind the term. In a
  One of the photographers who actually let me in his door was W. Eugene Smith, the celebrated magazine photojournalist who was a few years away from his death. When I saw him he was in poor health, after being poisoned by covering the Minamata Mercury pollution story. He was very kind, although also very critical about my work. But just being able to spend a few moments with him made me realize that I had a long way to go, and that photography wasn’t in the cards in terms of my own career.


